Enterprise IoT Pentesting: Firmware Extraction and Analysis


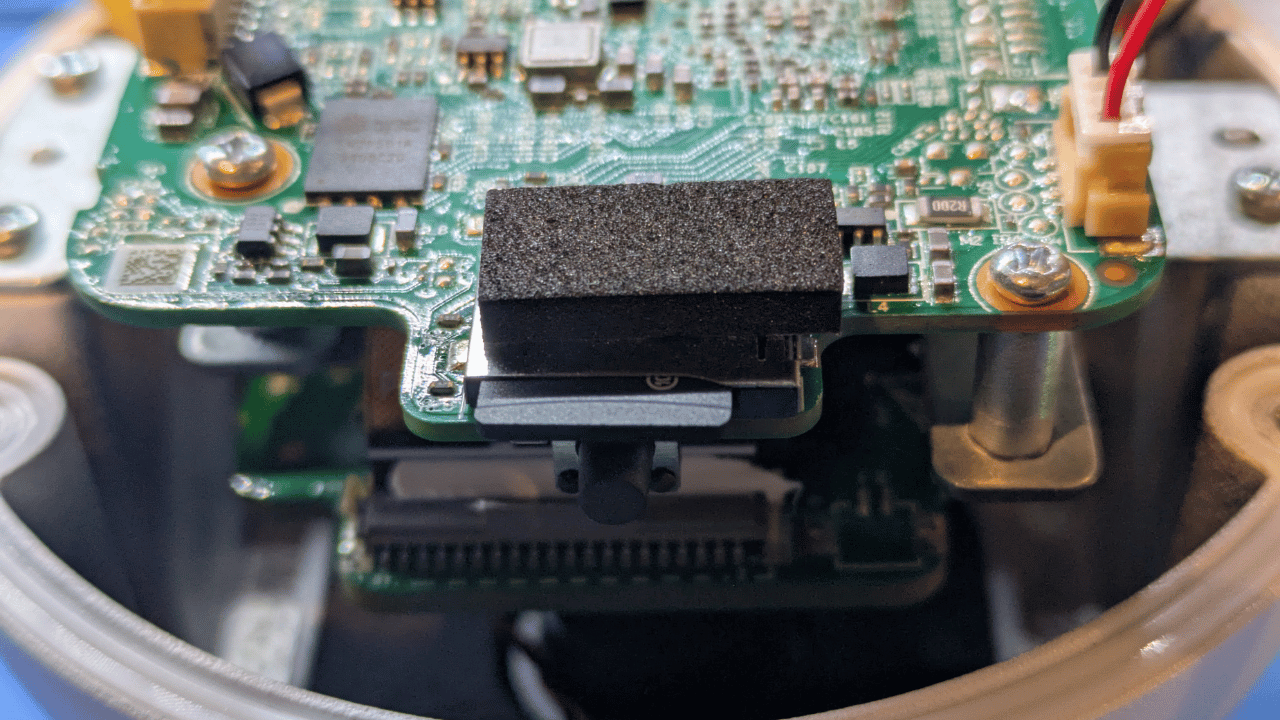
In the first segment in our Enterprise IoT Pentesting series, we obtained an unrestricted root shell over UART on our Uniview SC-3243 device.
Now we want to leverage that shell to extract the device firmware for analysis.
Enumerating Device Partitions
First, we will run the mount command to see what partitions are clearly mounted:
root@root:~$ mount
rootfs on / type rootfs (rw)
devpts on /dev/pts type devpts (rw,relatime,mode=600,ptmxmode=000)
proc on /proc type proc (rw,nosuid,nodev,relatime)
sysfs on /sys type sysfs (rw,nosuid,nodev,relatime)
tmpfs on /tmp type tmpfs (rw,relatime,size=90672k)
tmpfs on /var type tmpfs (rw,relatime)
devtmpfs on /dev type devtmpfs (rw,relatime,size=52076k,nr_inodes=13019,mode=755)
tmpfs on /root type tmpfs (rw,relatime,size=90672k)
ubi0:program on /program type ubifs (rw,relatime,assert=read-only,ubi=0,vol=0)
ubi1:config on /config type ubifs (rw,sync,relatime,assert=read-only,ubi=1,vol=0)
ubi2:cfgbak on /cfgbak type ubifs (rw,sync,relatime,assert=read-only,ubi=2,vol=0)
ubi3:calibration on /calibration type ubifs (ro,sync,relatime,assert=read-only,ubi=3,vol=0)
tmpfs on /etc type tmpfs (rw,relatime)
pstore on /sys/fs/pstore type pstore (rw,relatime)
The program, config, cfgbak and calibration ubifs partitions can be seen mounted.
Next, by reading the /proc/mtd file, we can see all of the device partitions on flash storage:
root@root:~$ cat /proc/mtd
dev:    size   erasesize  name
mtd0: 08000000 00020000 "spi4.0"
mtd1: 00100000 00020000 "spl"
mtd2: 00080000 00020000 "ddrinit"
mtd3: 00200000 00020000 "uboot"
mtd4: 00080000 00020000 "env"
mtd5: 00600000 00020000 "calibration"
mtd6: 00100000 00020000 "cliinfo"
mtd7: 00800000 00020000 "config"
mtd8: 00100000 00020000 "runtime"
mtd9: 00600000 00020000 "cfgbak"
mtd10: 00700000 00020000 "kernel"
mtd11: 00080000 00020000 "update"
mtd12: 05e00000 00020000 "program"
mtd13: 00080000 00020000 "other"
The block device for each of these partitions is accessible via /dev/mtdblockX:
root@root:~$ ls -l /dev/mtdblock*
brw-rw----    1 root     root       31,   0 Dec 31  1969 /dev/mtdblock0
brw-rw----    1 root     root       31,   1 Dec 31  1969 /dev/mtdblock1
brw-rw----    1 root     root       31,  10 Dec 31  1969 /dev/mtdblock10
brw-rw----    1 root     root       31,  11 Dec 31  1969 /dev/mtdblock11
brw-rw----    1 root     root       31,  12 Dec 31  1969 /dev/mtdblock12
brw-rw----    1 root     root       31,  13 Dec 31  1969 /dev/mtdblock13
brw-rw----    1 root     root       31,   2 Dec 31  1969 /dev/mtdblock2
brw-rw----    1 root     root       31,   3 Dec 31  1969 /dev/mtdblock3
brw-rw----    1 root     root       31,   4 Dec 31  1969 /dev/mtdblock4
brw-rw----    1 root     root       31,   5 Dec 31  1969 /dev/mtdblock5
brw-rw----    1 root     root       31,   6 Dec 31  1969 /dev/mtdblock6
brw-rw----    1 root     root       31,   7 Dec 31  1969 /dev/mtdblock7
brw-rw----    1 root     root       31,   8 Dec 31  1969 /dev/mtdblock8
brw-rw----    1 root     root       31,   9 Dec 31  1969 /dev/mtdblock9
SD Card Firmware Exfil
Now that we know where the firmware is we need to get it off the device. Luckily, this camera has an sdcard slot!
After inserting a fresh SD card in the device, it automatically mounts it to /mnt/sdcard:
root@root:~$ df -h | grep sdcard
df: /dev/pts: No such file or directory
/dev/mmcblk0p1           29.1G     64.0K     29.1G   0% /mnt/sdcard
We are going to copy the firmware in two different ways.
First, we will recursively copy all files and directories to the SD card:
cp -rP /program/ /mnt/sdcard/
cp -rP /tmp /mnt/sdcard/
cp -rP /var /mnt/sdcard/
cp -rP /config/ /mnt/sdcard/
cp -rP /cfgbak/ /mnt/sdcard/
cp -rP /calibration/ /mnt/sdcard/
cp -rP /etc/ /mnt/sdcard/
cp -rP /lib /mnt/sdcard/
cp -rP /bin /mnt/sdcard/
cp -rP /sbin /mnt/sdcard/
cp -rP /usr /mnt/sdcard/
Second, we will use dd to make raw copies of all 14 flash partitions:
dd if=/dev/mtdblock0 of=/mnt/sdcard/mtdblock0.bin bs=4M
dd if=/dev/mtdblock1 of=/mnt/sdcard/mtdblock1.bin bs=4M
dd if=/dev/mtdblock2 of=/mnt/sdcard/mtdblock2.bin bs=4M
dd if=/dev/mtdblock3 of=/mnt/sdcard/mtdblock3.bin bs=4M
dd if=/dev/mtdblock4 of=/mnt/sdcard/mtdblock4.bin bs=4M
dd if=/dev/mtdblock5 of=/mnt/sdcard/mtdblock5.bin bs=4M
dd if=/dev/mtdblock6 of=/mnt/sdcard/mtdblock6.bin bs=4M
dd if=/dev/mtdblock7 of=/mnt/sdcard/mtdblock7.bin bs=4M
dd if=/dev/mtdblock8 of=/mnt/sdcard/mtdblock8.bin bs=4M
dd if=/dev/mtdblock9 of=/mnt/sdcard/mtdblock9.bin bs=4M
dd if=/dev/mtdblock10 of=/mnt/sdcard/mtdblock10.bin bs=4M
dd if=/dev/mtdblock11 of=/mnt/sdcard/mtdblock11.bin bs=4M
dd if=/dev/mtdblock12 of=/mnt/sdcard/mtdblock12.bin bs=4M
dd if=/dev/mtdblock13 of=/mnt/sdcard/mtdblock13.bin bs=4M
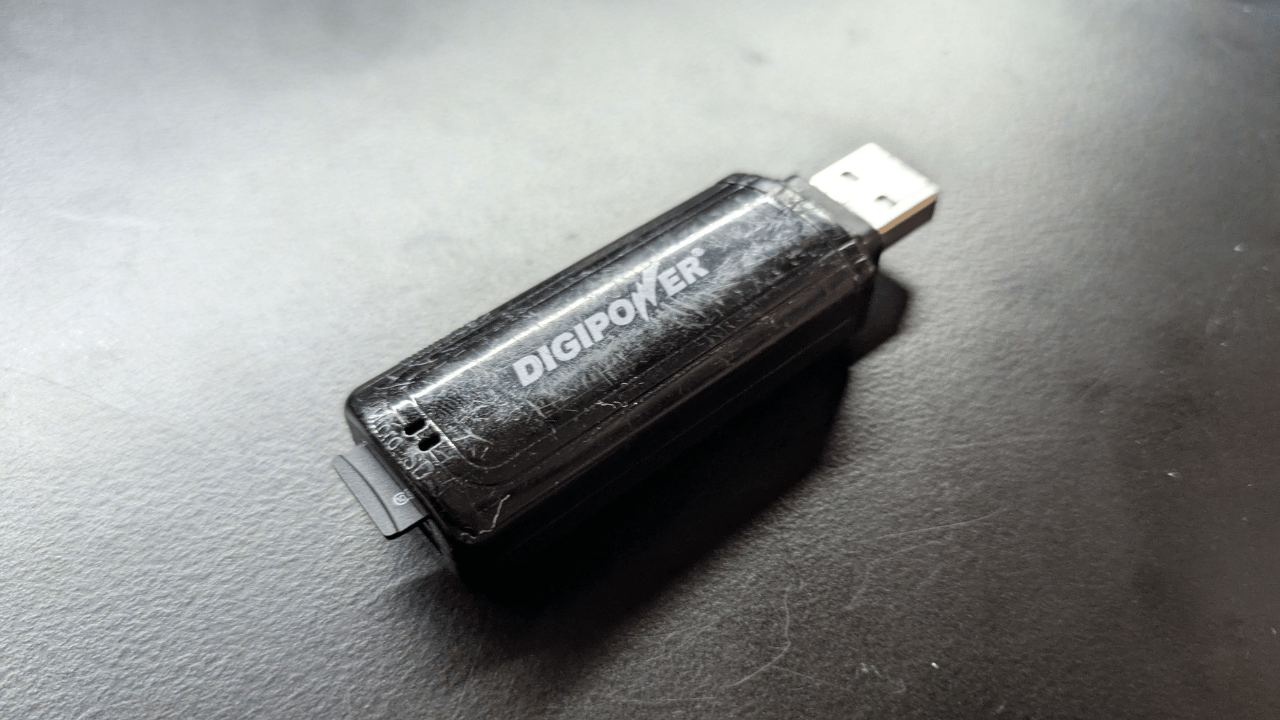
We then use a USB SD card adapter to transfer the files to our Linux computer for analysis:
Firmware Analysis
Now that we have all the firmware files transfered to our Linux computer, we can start to look for sensitive credentials, keys, config files, and other notable artifacts.
First we find that the device's passwd file is located in the config partition:
[nmatt@arch-dtop fw]$ cat config/KeyInfo/passwd
root:$6$Bd3NQn7hZqAn8UM2$CoBkMSnmoo5pWQxj7GobbCukzAEFWlBKYR0mZ/rr/Rkuqfza/GKxxMkApIOamAsEdPe6vAmpA2YMcjcx8VuU0/:0:0:Linux User,,,:/root:/usr/bin/uvsh
Next we recursively search for any signs of private keys:
[nmatt@arch-dtop fw]$ grep -r "PRIVATE KEY"
grep: mtdblock12.bin: binary file matches
config/SignedCert.key:-----BEGIN RSA PRIVATE KEY-----
config/SignedCert.key:-----END RSA PRIVATE KEY-----
grep: mtdblock0.bin: binary file matches
grep: mtdblock7.bin: binary file matches
grep: program/bin/wpa_supplicant: binary file matches
program/bin/ssl_cert_nobrand.pem:-----BEGIN RSA PRIVATE KEY-----
program/bin/ssl_cert_nobrand.pem:-----END RSA PRIVATE KEY-----
program/bin/ssl_cert.pem:-----BEGIN RSA PRIVATE KEY-----
program/bin/ssl_cert.pem:-----END RSA PRIVATE KEY-----
grep: program/bin/update_move: binary file matches
grep: program/lib/libwolfssl.so.35.5.1: binary file matches
This turned out one interesting lead: config/SignedCert.key. However, we will need to do more reverse engineering to understand what this keypair is used for.
An interesting bit of analysis we can perform is to determine if the config partition containing the key and password hash above is encrypted at rest. Recall from above that our reading of /proc/mtd showed that the config partition corresponds to mtd7 or the block device /dev/mtdblock7.
We can use the following binwalk command to generate an entropy graph that can help confirm or deny that the config partition is encrypted:
binwalk -E mtdblock7.bin
This produces the following entropy graph.
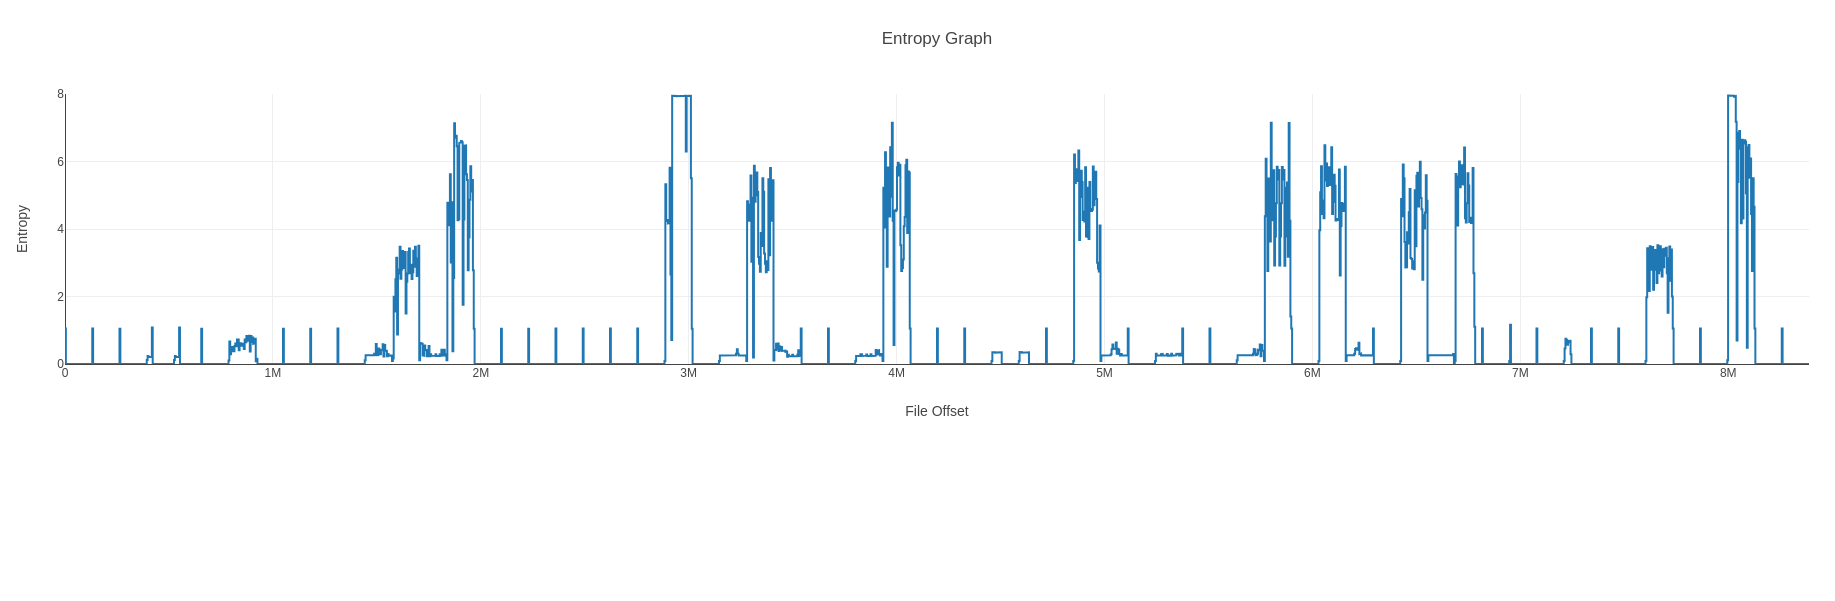
That is definitely not encrypted. Entropy graphs for encrypted (or compressed) data look like a straight line high up on the Y axis.
Let's see if we can find our password hash in the strings of the raw config partition dump.
[nmatt@arch-dtop fw]$ strings mtdblock7.bin | grep root:\\$
root:$6$iGl0.gIgbzWIeEq3$2vADLE2GSQbRpoFGsqFymtyvK5ixFr0S9cnS1ISCS9J1PPuqvudZSc6L36Ocqeq3oFsdRP8eHfHc8pnh1.J4p1:0:0:Linux User,,,:/root:/usr/bin/uvsh
root:$6$Bd3NQn7hZqAn8UM2$CoBkMSnmoo5pWQxj7GobbCukzAEFWlBKYR0mZ/rr/Rkuqfza/GKxxMkApIOamAsEdPe6vAmpA2YMcjcx8VuU0/:0:0:Linux User,,,:/root:/usr/bin/uvsh
We were able to find our password hash and another! (which I believe is the hash of the default password "123456")
Need IoT Security Expertise?
Brown Fine Security provides expert IoT penetration testing to help secure your connected devices. From hardware analysis to cloud API testing, we uncover vulnerabilities before attackers do.
Get a Free ConsultationWant to Learn IoT Hacking?
Ready to break into IoT security? Our hands-on training courses teach real-world hardware hacking, firmware analysis, and IoT exploitation techniques used by professional pentesters.
Explore Training Courses