Intercepting Mobile Application Traffic with Caido and Frida


I recently started a research project on the iHealth Nexus Pro Body Composition Scale. This device only communicates via Bluetooth Low Energy (BLE) to a mobile application. It is the mobile application itself that performs all communication with the company's cloud servers.
HTTP Proxy Tooling
As a security researcher, I often need to see inside of the HTTP communications of certain devices and applications in order to perform security testing. To do this, an HTTP proxy is an indispensable tool that allows security testers to read, modify and resend various HTTP requests. Caido is the latest HTTP proxy tool on the market, and has a few key features that have won me over. It's written in Rust and designed from the ground up to not consume large amounts of memory and compute resources. It also runs well on Linux which is important for me. So for this post, we are going to kick the tires and use Caido to intercept the traffic of the mobile application for our IoT device.
Device Prep
Some will ask why I'm using a physical device for this testing instead of an android emulator. Emulators are great, but in this case I need to use a real device that can communicate over BLE to the IoT device.
We will need to connect our android device to our Linux computer via a USB data cord and enable developer mode on the phone. We also must ensure that ADB is enabled in the develop options. Another pro tip is to enable the developer option to disable the phone display from turning off while plugged in via USB.
To check that we are able to connect to our phone over ADB, run the following command:
adb devices
List of devices attached
25281JEGR02143	device
It is also useful noting that everything in this post was performed on a non-rooted android device.
Caido Setup
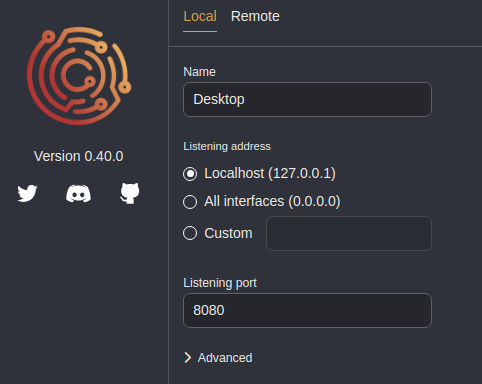
After Downloading and Installing Caido we need to create an instance. We will setup our instance to run locally and listen on localhost and TCP port 8080.
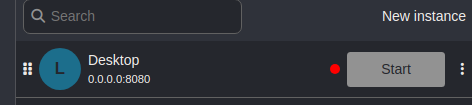
Then we click the Start button on the new instance we just created.
After that simply create and select a Project.

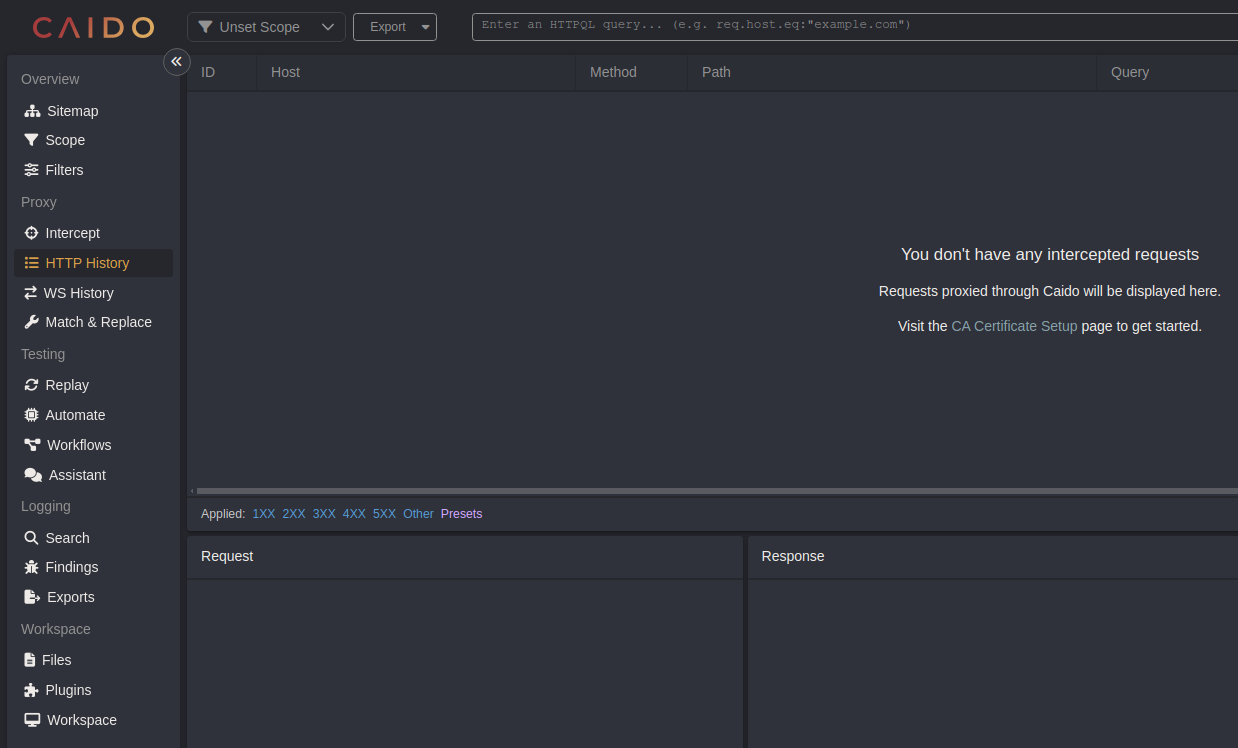
Finally, we can select the HTTP History tab on the left side and it will tell us it doesn't have any traffic intercepted yet.
Proxying Android Mobile Applications
Now we need to download our mobile application to our computer and then install it on our device. You can always download the app from the Google Play Store, but I like to download apps from a third party website like apkpure.
First let's download the iHealth MyVitals application and save it to a file named ihealth-myvitals-4.8.0.apk.
Now we can use adb to install the application to our mobile device:
adb install ihealth-myvitals-4.8.0
Now we need to configure our Wi-Fi network to use a manual HTTP proxy. To do this tap the Modify button on the Network details Wi-Fi screen. It's the pencil icon in the upper right side.

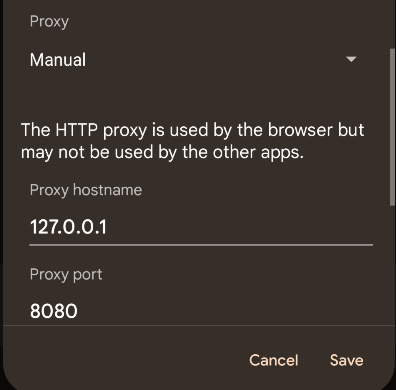
On this next screen select Manual under the Proxy dropdown and then fill in 127.0.0.1 for the Proxy hostname and 8080 for the Proxy port.
But wait! Why did we set 127.0.0.1 for the proxy hostname? Caido isn't running on our phone!! This is true, but we can use a cool feature in adb to reverse proxy localhost:8080 on the phone to port 8080 on our computer.
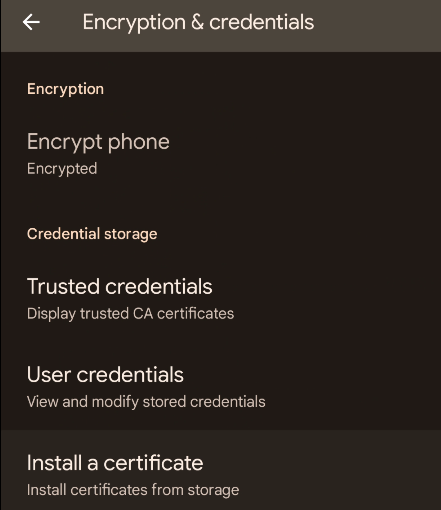
Next, we need to add Caido's CA certificate to the phone trust store. To do this first navigate to http://localhost:8080/ca.crt in a mobile web browser to download the CA certificate. On newer versions of android, you can't directly install a CA certificate from the browser screen since they see that as a security risk. You will need to navigate in your settings to Encryption and Credentials, select Install a certificate and then follow the prompts to trust Caido's CA certificate that should be in your phone's download folder.
adb reverse tcp:8080 tcp:8080
Now when android wants to sent traffic to localhost:8080 it will forward it, over the USB cord, to our computer's port 8080 where Caido is running!
Hitting a Wall: Certificate Pinning
Now that everything is setup, we should be able to receive traffic through our Caido proxy, but when firing up the iHealth mobile app something goes wrong.
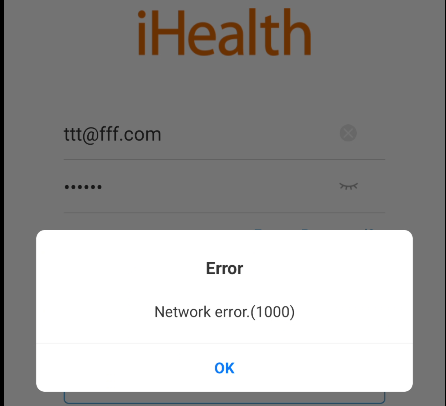
Let's check the android device's application logs to see what could be going wrong:
adb logcat
[ ------- TRUNCATED ------- ]
08-23 00:06:56.005  9896 10088 W System.err: javax.net.ssl.SSLHandshakeException: java.security.cert.CertPathValidatorException: Trust anchor for certification path not found.
[ ------- TRUNCATED ------- ]
Trust anchor for certification path not found.
This means that even though the android operating system trusts our root CA certificate, the application for some reason does not. This is because the android application is implementing CA certificate pinning. CA certificate pinning is the process of a TLS client performing a stricter check on the server certificate that verifies its authenticity using a smaller set of root CA's or even checking the server certificate itself against an expected copy of it stored in the application code.
Adding Frida Native Library to Mobile Application
To bypass certificate pinning we are going to use Frida. Frida is a dynamic instrumentation toolkit. Our end goal is to run a script from Frida's Codeshare Platform that will modify the running iHealth application to not perform certificate pinning. As I mentioned before, I'm doing all of this analysis on a non-rooted android phone. If our phone was rooted, we could use frida to attach to a running process on our mobile device. Instead, we will need to add Frida's Gadget library to the iHealth mobile application and install that modified app to our device.
I perform all of these modification steps alot, so I documented it all here in a GitHub Repo.
First, we need to unpack the APK file using apktool:
apktool d -o unpack ihealth-myvitals-4.8.0.apk
Then, we need to download frida's gadget library into the proper native libs directory:
cd unpack/lib/arm64-v8a
wget https://github.com/frida/frida/releases/download/16.1.5/frida-gadget-16.1.5-android-arm64.so.xz
unxz frida-gadget-16.1.5-android-arm64.so.xz
mv frida-gadget-16.1.5-android-arm64.so libfrida-gadget.so
Now we need to open the most important file in an android APK: AndroidManifest.xml.
First, there are a few settings we want to make sure are set correctly in the file. Let's look at the <application> element:
<application android:allowBackup="false" android:appComponentFactory="androidx.core.app.CoreComponentFactory" android:extractNativeLibs="false" android:icon="@mipmap/mv_icon_app_launcher" android:label="@string/app_name" android:largeHeap="true" android:name="com.ihealth.base.MyApplication" android:networkSecurityConfig="@xml/network_security_config" android:roundIcon="@mipmap/mv_icon_app_launcher" android:supportsRtl="true" android:theme="@style/Pro.Theme.NoActionBar" android:usesCleartextTraffic="true">
android:extractNativeLibs="false"
Notice that android:extractNativeLibs is set to false. We need that to be true.
Next we want to search for the activity name with the LAUNCHER category element.
<activity android:exported="true" android:launchMode="standard" android:name="com.ihealth.business.common.welcome.WelcomeActivity"
This gives us a launcher activity of com.ihealth.business.common.welcome.WelcomeActivity. This is effectively the entry point for the android application. Now let's look for that WelcomeActivity in the rest of the unpacked application directory.
grep -r 'com.ihealth.business.common.welcome.WelcomeActivity'
smali_classes2/com/ihealth/broadcastReceiver/LanguageReceiver.smali:    const-class v0, Lcom/ihealth/business/common/welcome/WelcomeActivity;
smali_classes2/com/ihealth/base/BaseActivity.smali:    const-class v1, Lcom/ihealth/business/common/welcome/WelcomeActivity;
smali_classes2/com/ihealth/business/common/guide/device/bpm1/e.smali:    check-cast v1, Lcom/ihealth/business/common/welcome/WelcomeActivity;
smali_classes2/com/ihealth/business/common/guide/device/bpm1/e.smali:    sget v3, Lcom/ihealth/business/common/welcome/WelcomeActivity;->e:I
smali_classes2/com/ihealth/business/common/guide/device/bpm1/e.smali:    iget-object v3, v1, Lcom/ihealth/business/common/welcome/WelcomeActivity;->a:Ljava/lang/String;
smali_classes2/com/ihealth/business/common/guide/device/bpm1/e.smali:    iget-object v5, v1, Lcom/ihealth/business/common/welcome/WelcomeActivity;->b:Ljava/lang/String;
smali_classes2/com/ihealth/business/common/guide/device/bpm1/e.smali:    iget-object v6, v1, Lcom/ihealth/business/common/welcome/WelcomeActivity;->c:Ljava/lang/String;
smali_classes2/com/ihealth/business/common/guide/device/bpm1/e.smali:    iget v7, v1, Lcom/ihealth/business/common/welcome/WelcomeActivity;->d:I
smali_classes2/com/ihealth/business/common/trampoline/TrampolineActivity.smali:    const-class v2, Lcom/ihealth/business/common/welcome/WelcomeActivity;
smali_classes2/com/ihealth/business/common/welcome/WelcomeActivity.smali:.class public Lcom/ihealth/business/common/welcome/WelcomeActivity;S
smali_classes2/com/ihealth/business/common/welcome/WelcomeActivity.smali:    iput-object v2, p0, Lcom/ihealth/business/common/welcome/WelcomeActivity;->a:Ljava/lang/String;
smali_classes2/com/ihealth/business/common/welcome/WelcomeActivity.smali:    iput-object v2, p0, Lcom/ihealth/business/common/welcome/WelcomeActivity;->c:Ljava/lang/String;
smali_classes2/com/ihealth/business/common/welcome/WelcomeActivity.smali:    iput-object v2, p0, Lcom/ihealth/business/common/welcome/WelcomeActivity;->b:Ljava/lang/String;
smali_classes2/com/ihealth/business/common/welcome/WelcomeActivity.smali:    iput v0, p0, Lcom/ihealth/business/common/welcome/WelcomeActivity;->d:I
smali_classes2/com/ihealth/business/common/welcome/WelcomeActivity.smali:    const-class v4, Lcom/ihealth/business/common/welcome/WelcomeActivity;
AndroidManifest.xml:        <activity android:exported="true" android:launchMode="standard" android:name="com.ihealth.business.common.welcome.WelcomeActivity" android:screenOrientation="portrait" android:theme="@style/AppStart">
grep: build/apk/classes2.dex: binary file matches
There are some false positives, but the smali_classes2/com/ihealth/business/common/welcome/WelcomeActivity.smali stands out as a file that probably defines the WelcomeActivity class. We want to modify this class to add a bit of code that will call our Frida Gadget library as soon as the application starts.
We search inside this file for .method public constructor <init>()V to find the method we want to modify:
# direct methods
.method public constructor <init>()V
    .locals 0

    .line 1
    invoke-direct {p0}, Lcom/trello/rxlifecycle3/components/support/RxAppCompatActivity;-><init>()V

    .line 2
    .line 3
    .line 4
    return-void
.end method
We will change that file to look like the file below:
# direct methods
.method public constructor <init>()V
    .locals 1

    const-string v0, "frida-gadget"
    invoke-static {v0}, Ljava/lang/System;->loadLibrary(Ljava/lang/String;)V

    .line 1
    invoke-direct {p0}, Lcom/trello/rxlifecycle3/components/support/RxAppCompatActivity;-><init>()V

    .line 2
    .line 3
    .line 4
    return-void
.end method
Notice that we change the number of local variables from 0 to 1. We also added two lines of code:
const-string v0, "frida-gadget"
invoke-static {v0}, Ljava/lang/System;->loadLibrary(Ljava/lang/String;)V
This is the code that will execute our Frida Gadget library. Next, we navigate back up to where we unpacked the application and prepare to repack the APK file.
We run the following command to repack our APK file:
apktool b --use-aapt2 -o mod-app.apk unpack/
Next we ZIP align the apk file:
zipalign 4 mod-app.apk final-mod-app.apk
All APK files need to be signed by a key. We run the following command to create a java key store (JKS):
keytool -genkey -v -keystore custom.keystore -alias mykeyaliasname -keyalg RSA -keysize 2048 -validity 10000
Now sign the APK file with our newly minted JKS:
apksigner sign -ks custom.keystore final-mod-app.apk
Next let's manually uninstall the original iHealth mobile application and then use adb to install our newly modified application:
adb install final-mod-app.apk
Intercepting Traffic with Caido
Now when we launch the modified android application it will pause on the startup screen:

The application has successful executed the Frida Gadget library and has paused waiting for frida to connect to it over ADB.
Next we will run a Frida Codeshare script to bypass certificate pinning:
frida -U gadget --codeshare sowdust/universal-android-ssl-pinning-bypass-2
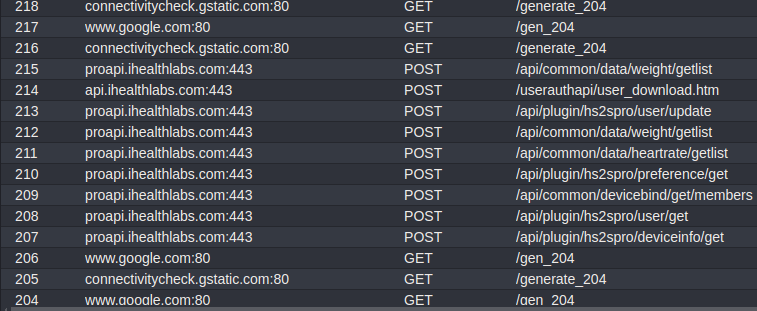
Now the application resumes and we can now see data appear in Caido!
This is awesome, but there is a bunch of data to random google services that we don't care about. Let's filter this out.
In Caido, you can create scopes that define what requests should appear in your HTTP History window.
I will create a scope called ihealth with an In Scope entry of *.ihealthlabs.com.
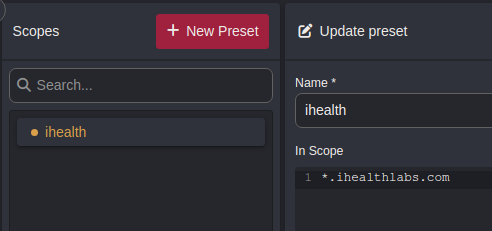
Now when we navigate back to the HTTP History window, we can select our ihealth scope in the upper left hand corner of the screen. Now we just see what we want to see!

Now I can use the mobile application to discover all the API endpoints that exist to find vulnerabilities in the mobile APIs and understand the IoT system as a whole.
Next Steps
Next, I plan to dig into the BLE communication protocol that is used to send fitness data between the scale device and the mobile application.
Need IoT Security Expertise?
Brown Fine Security provides expert IoT penetration testing to help secure your connected devices. From hardware analysis to cloud API testing, we uncover vulnerabilities before attackers do.
Get a Free ConsultationWant to Learn IoT Hacking?
Ready to break into IoT security? Our hands-on training courses teach real-world hardware hacking, firmware analysis, and IoT exploitation techniques used by professional pentesters.
Explore Training Courses